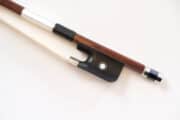
Sometimes better bows need to be de-warped (re-cambered). A magic old substance protects the wood from the heat!
New Orleans' Violin Shop
Sometimes better bows need to be de-warped (re-cambered). A magic old substance protects the wood from the heat!
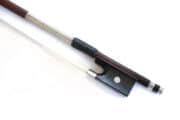
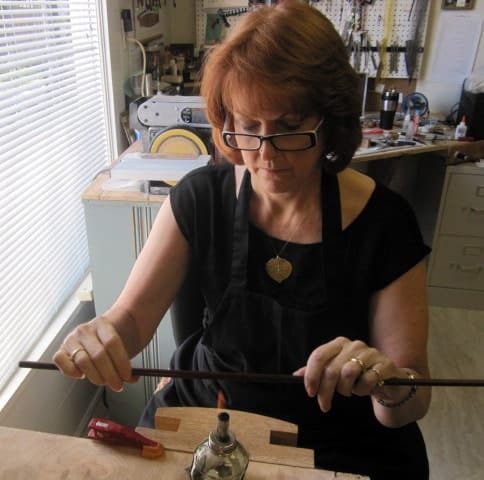
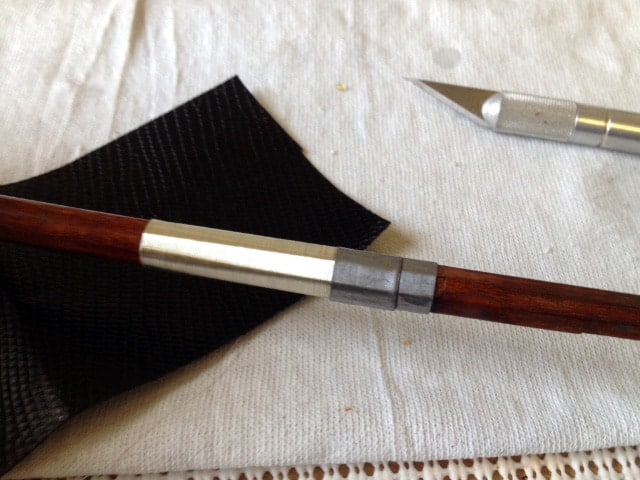
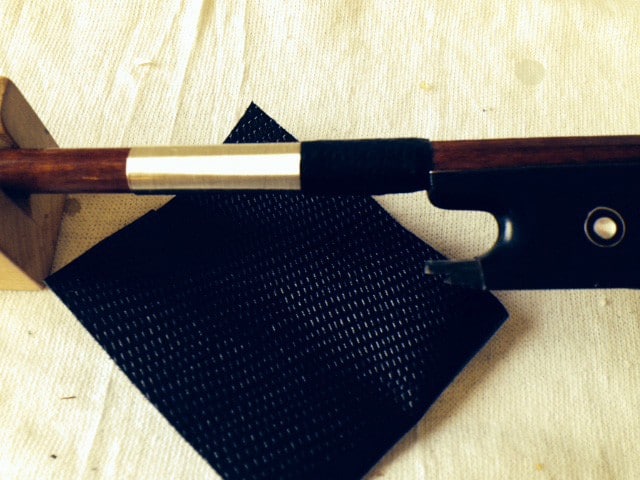
Get a grip! Wonderful old cello bow gets sterling silver winding with lizard. Do you know what is under the lizard grip? It is lead tape, used to add weight and bulk under the grip.
September 16, 2009
Mr. Wheetman:
RE: Repair to David Hopf violin by Keller Strings.
The following is a description of restoration completed and impressions of prior repairs.
After the top was removed, we discovered many open old cracks. A row of thin maple had been added to create a wider rib. When this was done, there was too much material in several places causing the top to bulge and twist, particularly at the bottom bout where the saddle sits and on the upper left (E) bout. An older repair included several large tall and bulky cleats to the top cracks. We cleaned all of the open cracks (approx. 8) and removed some of the tall cleats; reshaped and replaced them. New cleats were added to reinforce. The base bar crack was open at the lower 3 inches. The old patch was removed and three L cleats were added to reinforce this crack. Clear spirit varnish was added over the repaired cracks for protection.
No additional work was needed to the back cracks and previous cleats were left untouched although some were thinned.
The edge of the top on the lower bout on the G side was missing so a new edge was carved and installed.
Since the scroll box showed many older repairs including peg bushings, the decision was made to reinforce the interior of the box with 1 ½ mm thick maple. Any further damage to the box will most likely require the replacement of the scroll and peg box with a scroll graft. The shape and size of the existing peg holes was not changed. The decision to replace the pegs was made as the old pegs were worn and too short.
French polish was added for appearance and more protection to the varnish.
Paula Keller Smith
John W. Smith
Well, there you are! You’ve made it to Carnegie Hall, or Preservation Hall. Maybe your instructor mentioned that it might be better if you practiced in the hall…in a different building….
You know that your instrument used to sound better than that. It used to be clear as a bell. Now you are hearing that annoying buzz. It isn’t always there; only on certain notes and only then if you’re really leaning in to it, or perhaps playing quietly to yourself. The circumstance will almost always be different, but the cause is nearly always the same: a loose seam, or a separation in the spot where the fingerboard extends from the neck.
Orchestral stringed instruments are assembled using natural hide glue that is heated just before use. The common and accepted materials for these instruments are Spruce for the top plate and Maple for the sides, back and neck. The fingerboard is generally Ebony. Over time, with the expansion and contraction of the upper plate (top) of the instrument which is different than the sides and back, the glue can release in one of the seams. This is a good thing, because if there is a stress point and the glue didn’t release, it could cause a crack to open in one of the surfaces.
There you are, thirty minutes to curtain and your nemesis the buzz has reared its ugly head. If you can locate the opening by pulling very gently on the seams, watching for the shadow of a gap (be very careful when doing this on the C-bout tips, or they’ll snap off) then the seam can be re-affixed using nothing more than a little hot water, the chinrest and a paper clip with one loop straightened. This will be a temporary fix until you can get your instrument in to the shop for a proper checkup.
First remove the chinrest from the instrument using the straightened paper clip (or chinrest key). Be very careful not to push the paperclip so far through the chinrest turnbuckle that you scratch the rib with the end. The chinrest will become the gluing clamp for your repair.
Using whatever you can find (something thin but not sharp) drip a little hot water in to the open seam. Move the seam a little to help work the water in to the space, and then quickly attach the chinrest to the instrument being careful not to over tighten the turnbuckles. It won’t take much pressure. A good sign is if a little water is pushed back out as it is tightened. If needed wipe the edge with a cotton cloth. Leave clamped as long as you have time for (the longer the better).
When you remove the clamp, try to resist the temptation to give the spot a little tug to find out if it is holding. You could easily pop it back open. This quick fix will stand a decent chance of holding until you can get it in to Keller Strings for the proper attention it deserves.
Several years ago one of our customers was telling me about an incident that had occurred many years earlier. He was playing with a cherished bow given to him by musician John Denver. As can sometimes happen, the bow flew out of his hands and sailed tip first straight to the stage floor and broke. He kept the bow (both pieces), wondering if or how it could ever be fixed.
Once the tale had been told, I asked him if I could take a look at it.
When a bow is broken off close to the head without leaving any damage to the head of the bow itself, it can be an issue to decide which way to go with a repair. The first repair option would be a head splice in which the broken ends are brought together with the strongest glue. Then a thin saw blade is used to cut a slot lengthwise through the repair joint and through the upper part of the bow head. After cutting, a strip of hardwood veneer or Pernambuco Wood is inserted. This is a difficult repair as the slenderness of a high quality bow stick needs support and to be very stable while cutting and inserting. If this repair were to go poorly, or wasn’t an option, there is another method of restoration. A graft is made from the tip end portion from another bow (around six to eight inches long). I always prefer the first method as it should preserve the weight and balance of the bow. Once complete, the repair should disappear with the correct stain and French polish. This repair starts at $70, plus the cost of a re-hair, so you are looking at a minimum of $130.
This story is not unusual, and it seems common that musicians do not believe that a break of this type can be fixed. The cost of more time-consuming repairs—such as reattaching the head, replacing the tip, or restoring a crumbling frog, can soon overtake the value of most bows. Also, some kinds of damage devalue a bow so much that it may not make financial sense to undertake expensive repairs. On the other hand, if you love the bow for its qualities and repairing can make it playable again, then it may well be worth the price. You should consult Keller Strings to help you make a sensible decision.

 Visit our online store for great finds!